
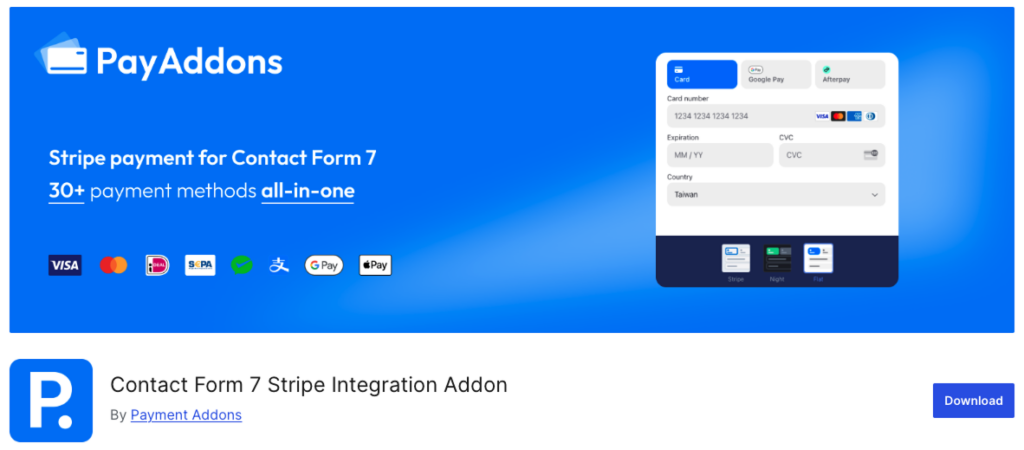
Introduction to the Plugin
Installation and Setup Process
Step 1: Install the Plugin
Install from wordpress.org plugin (recommended)
- Log in to your WordPress admin panel.
- Navigate to Installed Plugin > Add New.
- In the search bar, type “Contact Form 7 Stripe Integration Addon” and click Install Now
- Once installed, click Activate to enable the plugin on your site.
This process is standard for WordPress plugins and ensures the plugin is ready for configuration.
Step 2: Set Up Your Stripe Account
To process payments, you need a Stripe account. If you don’t have one, sign up at Stripe.
- Visit Stripe and create a free account.
- After logging in, go to the Stripe dashboard and navigate to Developers > API Keys.
- Copy your Publishable Key and Secret Key. These are essential for connecting your WordPress site to Stripe.
Note: For testing, use test mode keys; for live transactions, switch to live mode keys.
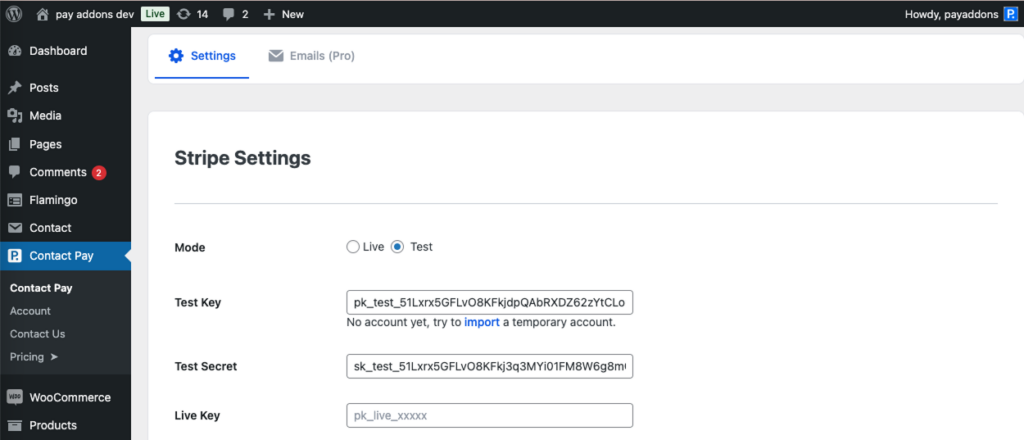
Step 3: Configure Plugin Settings
After activation, configure the plugin with your Stripe API keys:
- Go to the plugin settings page, typically found under Settings or a dedicated menu item like “Contact Pay”
- Enter the publishable key and secret key obtained from Stripe.
- Select the payment mode (Live or Test) based on your needs.
- Set the default currency and any other preferences, such as enabling test mode for development.
This step ensures the plugin can communicate with Stripe for processing payments.
Step 4: Create or Edit a Contact Form 7 Form
Next, create a new form or edit an existing one using Contact Form 7:
- Navigate to Contact Form 7 > Add New to create a new form, or select an existing form to edit.
- Design your form with necessary fields, such as name, email, and any additional information relevant to your use case.
Step 5: Add Payment Fields to the Form
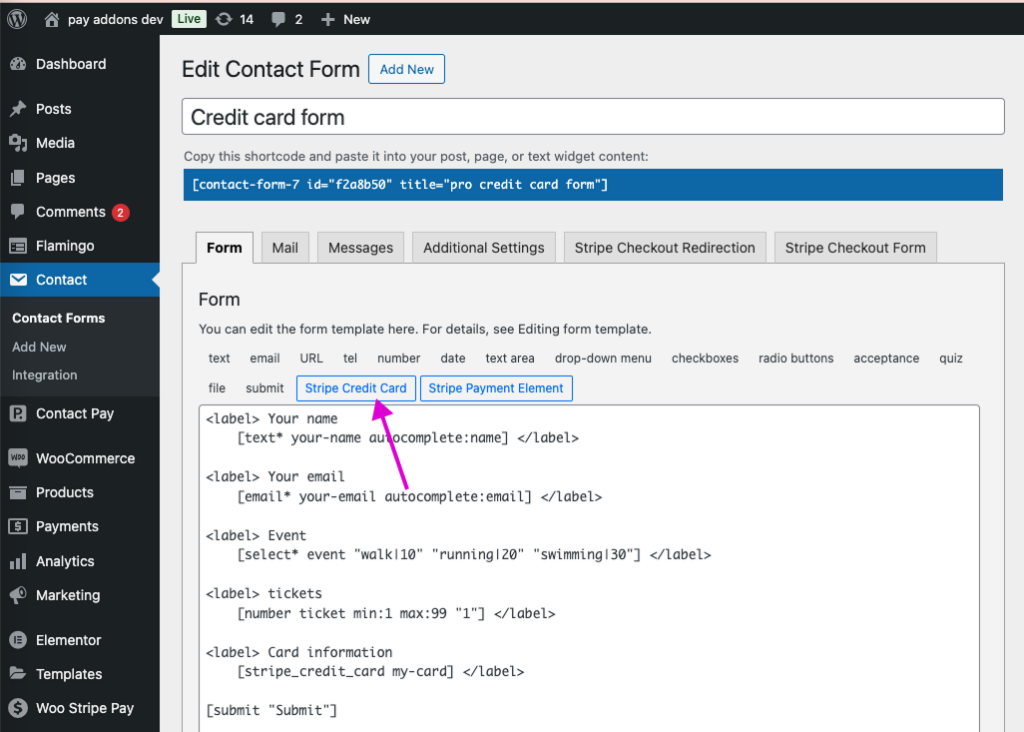
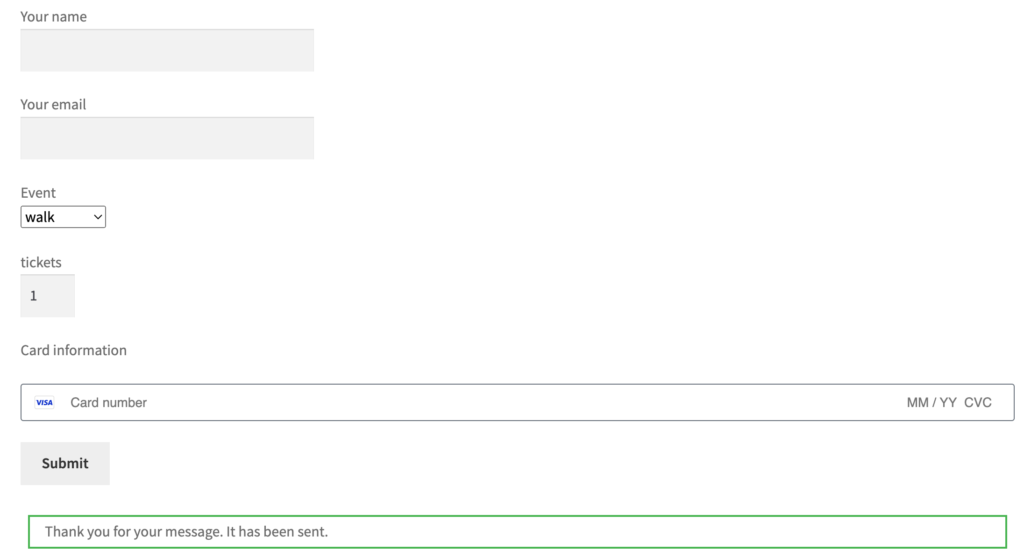
					<label> Your name
    [text* your-name autocomplete:name] </label>

<label> Your email
    [email* your-email autocomplete:email] </label>

<label> Event
    [select* event "running|10" "walking|20" "swimming|30"] </label>

<label> tickets
    [number ticket min:1 max:99 "1"] </label>

<label> Card information
    [stripe_credit_card my-card] </label>

[submit "Submit"]
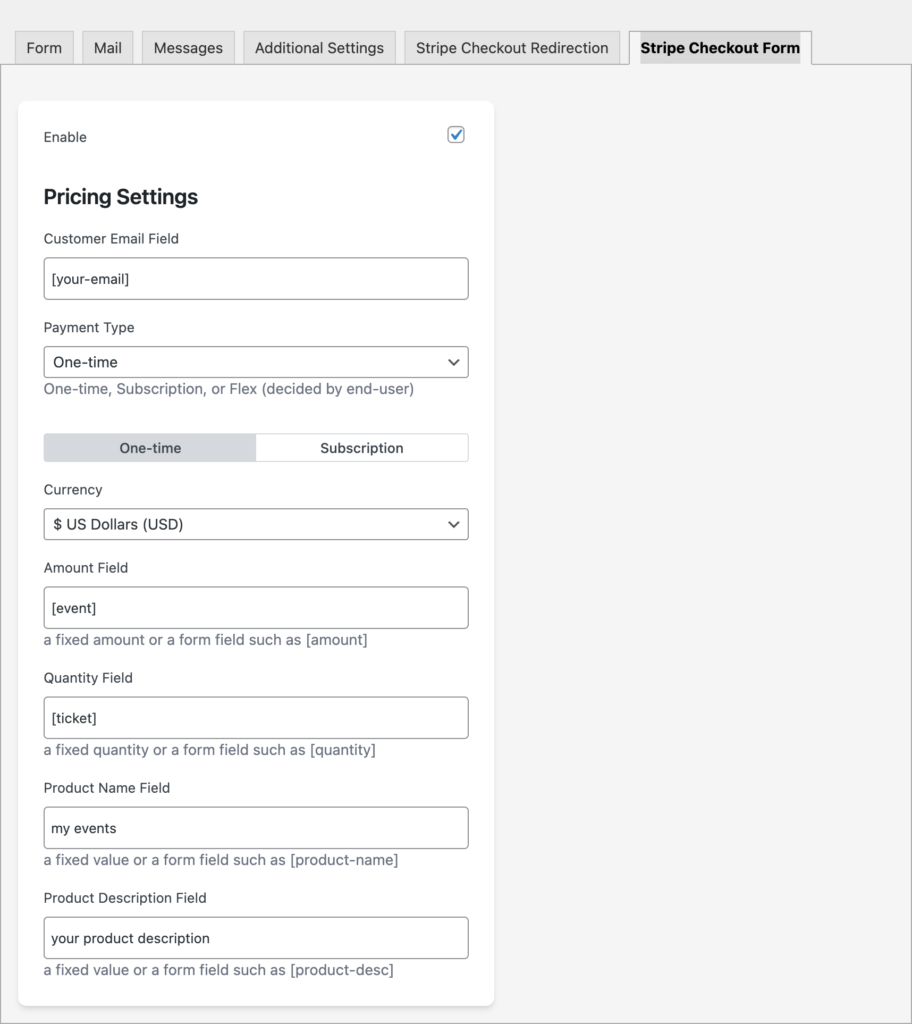
Step 6: Checkout Configuration
After inserting the credit card field, we can now set up the pricing under Stripe Checkout Form tab.
Preview & Testing
Before going live, test your form to ensure everything works as expected:
- Switch to test mode in the plugin settings and use Stripe’s test credit card numbers for transactions.
- Submit the form and verify that the payment is processed successfully.
Try the below testing card:
Visa 4242424242424242 Any 3 digits Any future date
Regarding more testing cases, refer to https://docs.stripe.com/testing
Advanced Features and Pro Version
The plugin offers additional features in its Pro version, such as:
- Flexible Subscriptions (Stripe Checkout Redirection & Checkout Form)
- Credit Card Field
- Payment Element Field (30+ payment methods all in one)
- Email Notification