Stripe Payment Element is Stripe’s newest and most flexible payment UI component that combines all of Stripe’s payment methods into a single integration.
Unlike legacy payment UIs, Payment Element is:
✅ Smart – Dynamically displays payment methods based on:
Customer’s country
Transaction amount
Device type
Historical preferences
✅ Unified – Replaces multiple integrations with one future-proof solution
✅ High-Converting – Stripe reports 10-15% higher completion rates vs. traditional checkouts
“Payment Element reduced our payment integration workload by 80% while increasing international sales.” – SaaS Founder
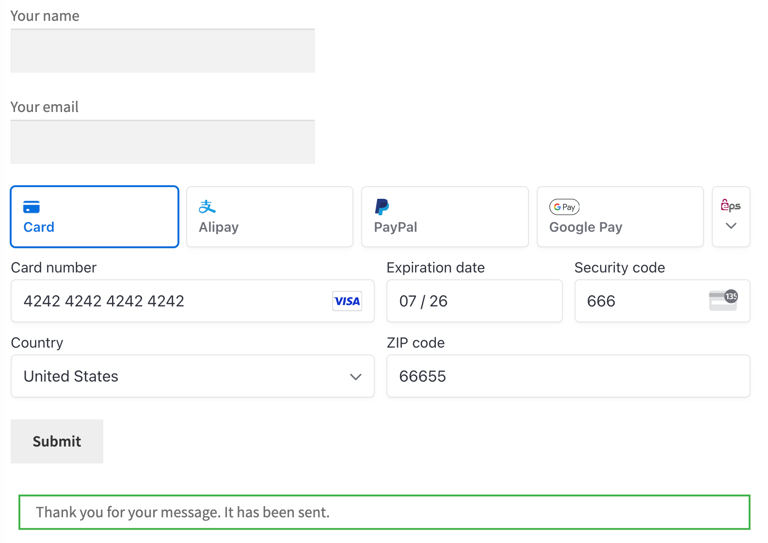
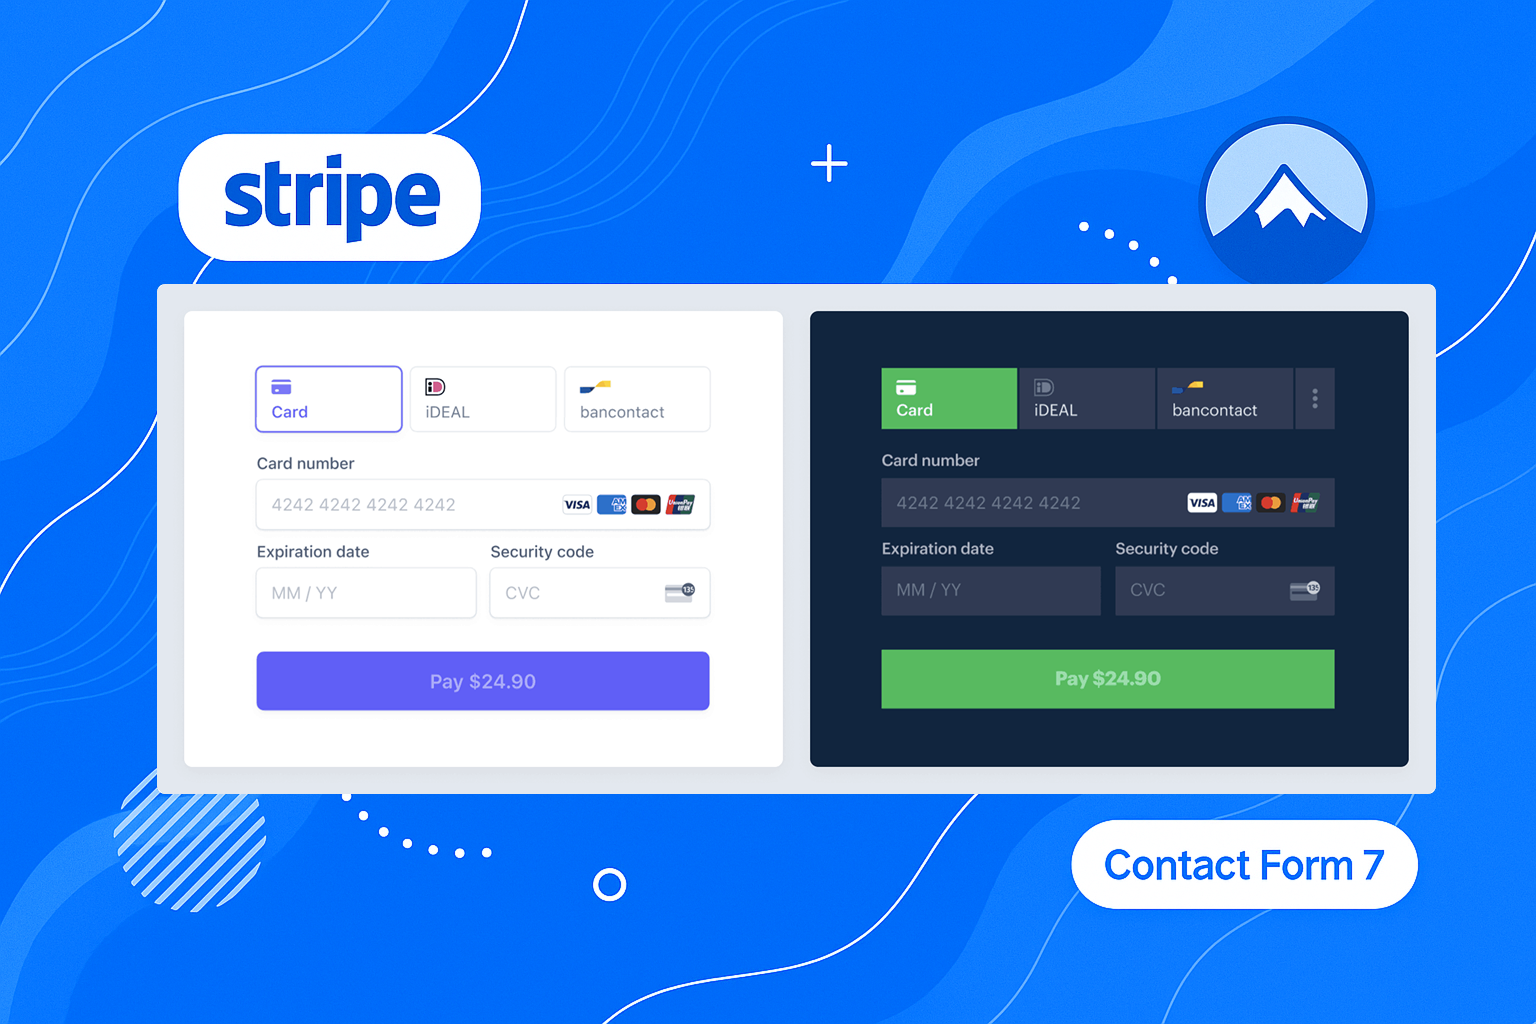
Our Contact Form 7 Stripe Payment plugin integrates this powerful component directly into your Contact Form 7 forms, allowing you to collect payments using any of the 40+ payment methods supported by Stripe without having to write a single line of code.

Form Checkout Redirect ( documentation & online demo )
- Seamless redirection to Stripe-hosted checkout pages for one-time payments after submitting your form.
- Dynamic form field for the pricing setting.
- Sending CF7 email after payment success. (webhook is required to setup)
- PCI-compliant payment processing.
- Full integration with Stripe Link for faster repeat purchases. (Pro)
 Flexible Subscriptions (Pro) ( documentation & online demo )
- Create recurring payment plans with custom intervals
- Automated billing and payment handling
 Embedded Credit Card Forms (Pro)( documentation & online demo )
- Integrate credit card fields directly into your forms
- Support for dynamic pricing options
- Custom subscription configurations
- Real-time card validation
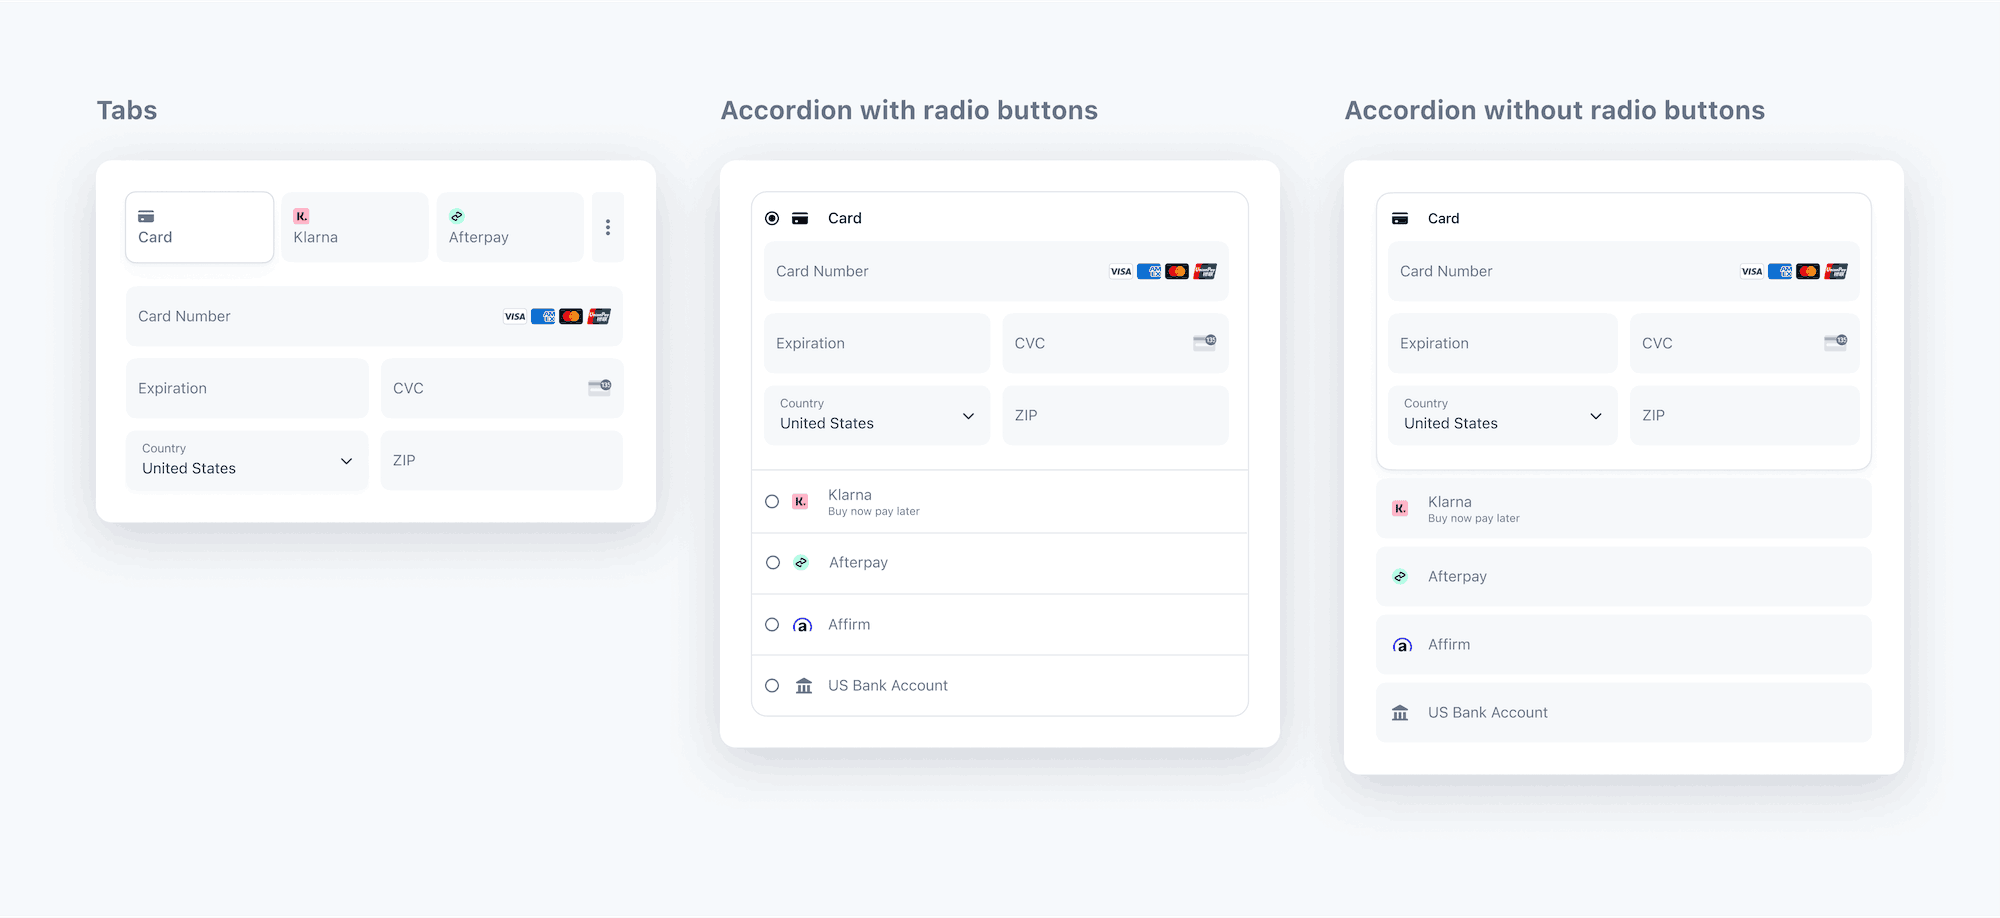
Embedded Payment Elements (Pro) ( documentation & online demo )
- Multiple payment methods with one-time & recurring support, including Credit Cards, Google Pay, ApplePay, WeChat Pay, Alipay, Afterpay, ACH, Klarna, iDEAL, FPX, Grabpay, OXXO, Multibanco, Bancontact, EPS, P24, Giropay, Affirm, and more.
- Mutiple layouts, dark and light themes, and so on.
- Dynamic to enable Google Pay & Apple Pay.
 Email Notification (Pro)
We currently offer notifications for three event types, You can design your email templates with built-in placeholder fields like amount, currency, customer email, address, etc…
- Payment Succeeded
- Payment Failed
- Customer Invoice
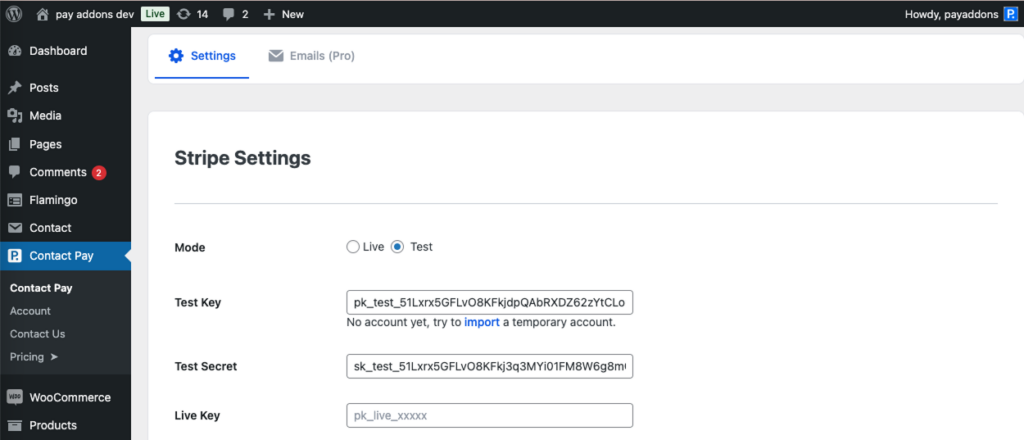
To process payments, you need a Stripe account. If you don’t have one, sign up at Stripe.
- Visit Stripe and create a free account.
- After logging in, go to the Stripe dashboard and navigate to Developers > API Keys.
- Copy your Publishable Key and Secret Key. These are essential for connecting your WordPress site to Stripe.
- Open our plugin-> settings, paste the above keys into it.
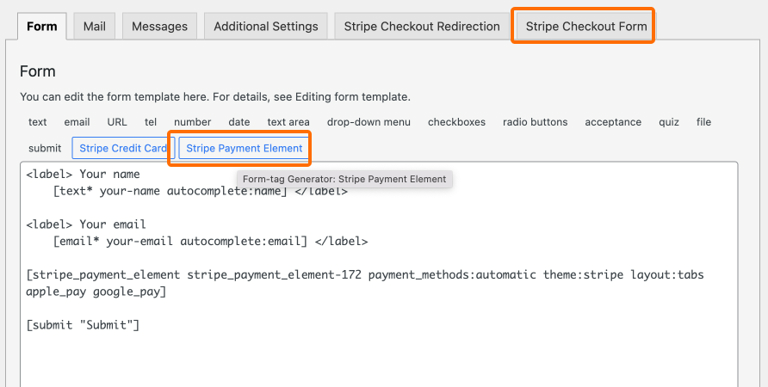
Navigate to Contact From -> Add New, we will use two parts:
- Stripe Payment Element Field
- Stripe Checkout Form tab
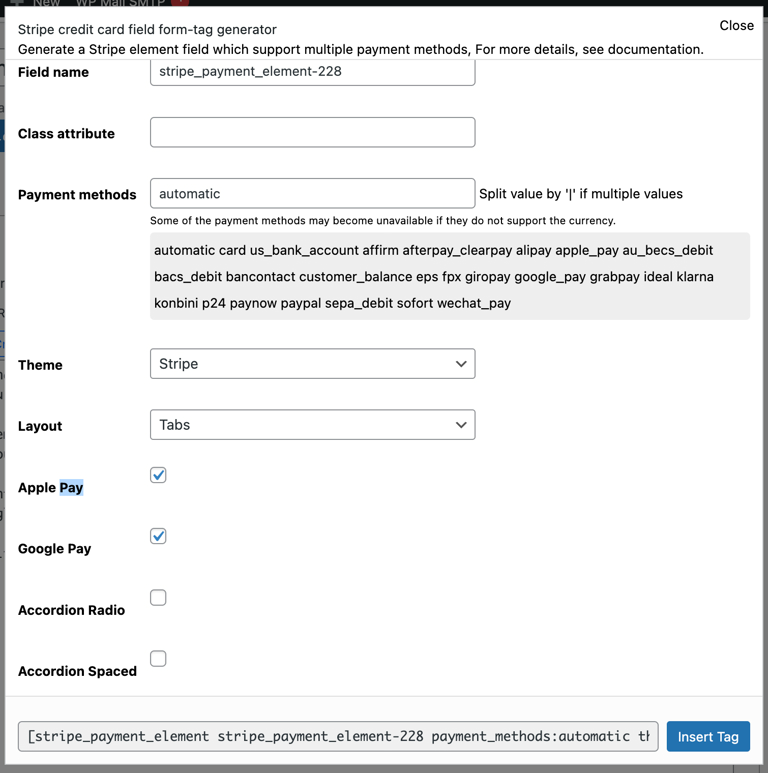
Some examples:
[stripe_payment_element my-field payment_methods:automatic theme:stripe layout:tabs apple_pay google_pay]
[stripe_payment_element my-field payment_methods:card| payment_methods:sofort|google_pay|apple_pay theme:night layout:accordion apple_pay google_pay accordion_radio accordion_spaced]
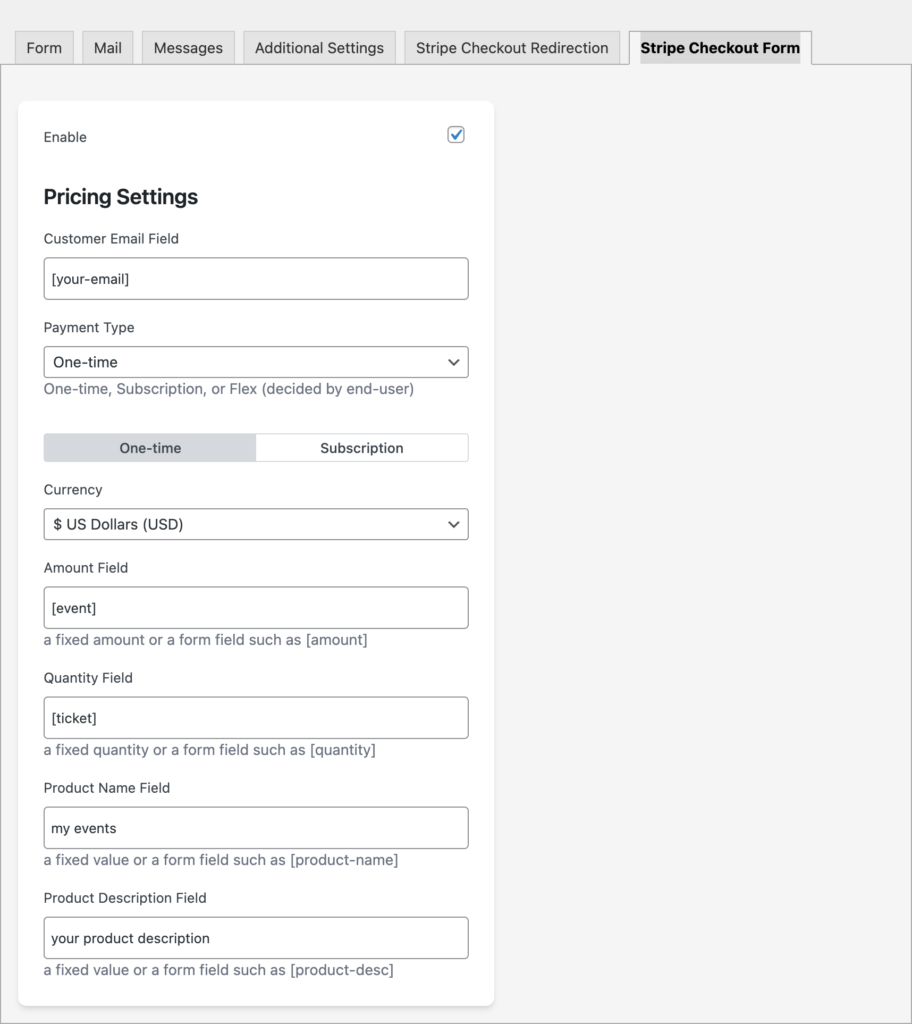
After inserting the field, we can now set up the pricing under Stripe Checkout Form tab.
Before going live, test your form to ensure everything works as expected:
- Switch to test mode in the plugin settings and use Stripe’s test credit card numbers for transactions.
- Submit the form and verify that the payment is processed successfully.